Chapter 1: Getting Started with Chat GPT and Leonardo.ai
Creating children’s story books has never been easier with the power of free AI tools. In this chapter, we will walk you through the first step of effortlessly creating your own storybook using Chat GPT and Leonardo.ai. Let’s get started!
If you’re not familiar with Chat GPT, it is an AI-powered language model developed by OpenAI. It can generate human-like text based on the given prompts. And Leonardo.ai is an image generation tool also developed by OpenAI, which can create stunning visuals based on the provided text.
First, head over to Chat GPT and ask it to write a short children’s story book with chapters. You can provide a simple prompt like, “Can you help me write a children’s story book?” or any other relevant introduction. Chat GPT will then generate a story for you.
Once you have the story generated by Chat GPT, it’s time to move on to Leonardo.ai to create images for your book. Start by selecting the appropriate dimensions and quantity for the images you want to generate. Paste the story prompt, or specific parts of the story, into Leonardo.ai and let it work its magic. It will generate relevant images based on the text provided.
Repeat the process for each chapter of your storybook. Copy the context for each chapter from Chat GPT and paste it into Leonardo.ai to generate images that correspond with the story. After generating the images, save the ones you like for each chapter. This way, you will have a collection of visual assets for your storybook.
Now that you have the story and the images, it’s time to bring them together in a visually appealing format. Head over to Canva.com, a popular online graphic design tool, and select a storybook template. Upload and arrange the images you generated into the template, making sure to create a consistent flow for the story.
Copy the context for each chapter from Chat GPT and paste it over the corresponding images in Canva. This will help in providing a narrative structure for your storybook. Repeat this process for all the chapters of your book, adding pages as needed to accommodate the text and images.
Next, customize the cover page with graphics and text that represent your storybook. Create an eye-catching design that will grab the attention of potential readers. Follow it up with the title page and chapter titles, ensuring that each chapter has a distinct visual identity.
Once you have completed your storybook layout, take a moment to review and proofread the entire book. Make sure the text and images align properly, and there are no formatting errors or typos.
When you are satisfied with the final result, click on the share button in Canva to download your storybook in PDF format. This will allow you to easily distribute and share your creation with others.
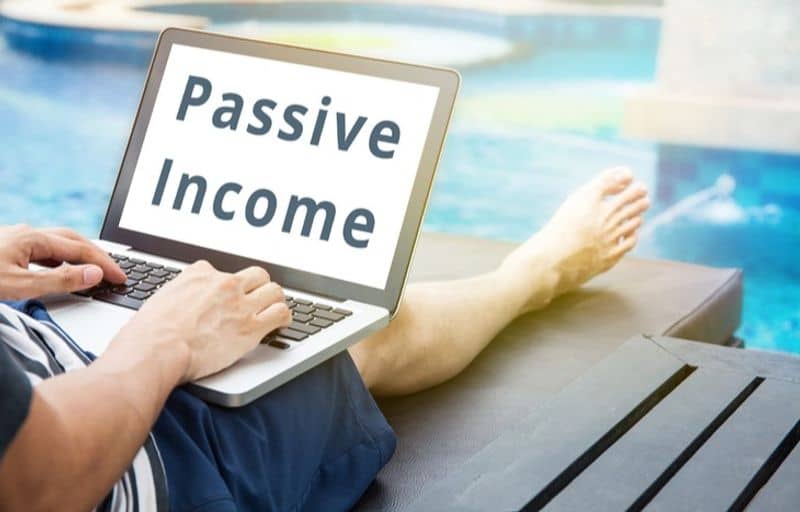
But why stop at sharing? If you want to turn your creation into a source of passive income, you can sell your storybook online. One of the popular platforms for self-publishing is Amazon Kindle Direct Publishing (KDP).
Start by creating an account on KDP if you don’t have one already. It’s a straightforward process, and you’ll need to provide some basic personal information and banking details for royalty payments.
Once your account is set up, you can upload your storybook in PDF format to KDP. Fill in the required details including the book title, author name, and description. You can also set a price for your book, which will determine the royalty you earn for each sale.
With your storybook uploaded and published on Amazon, it’s time to start earning money. Promote your book through different marketing channels and leverage social media to reach potential readers. KDP offers various promotional tools and resources to help you increase visibility and drive sales.
Remember, creating children’s storybooks and earning passive income through AI tools like Chat GPT and Leonardo.ai is an ongoing process. Keep refining your storytelling skills, exploring new templates and designs, and experimenting with different promotional strategies to maximize your success.
Chapter 1 of this series has introduced you to the initial steps of effortlessly creating a children’s storybook. Stay tuned for Chapter 2, where we will dive deeper into generating story images and context with Leonardo.ai.
Chapter 2: Generating Story Images and Context with Leonardo.ai
Now that you have written a short children’s story book with chapters using Chat GPT, it’s time to bring your story to life with captivating images. In this chapter, we will explore how to generate story images and context using Leonardo.ai, a free AI tool that will save you time and effort in creating visually appealing illustrations for your book.
Leonardo.ai offers a user-friendly interface that allows you to easily generate high-quality images based on your story prompt. Let’s dive into the process step by step:
Step 1: Accessing Leonardo.ai
To get started, open your web browser and visit leonardo.adobe.com. If you don’t already have an account, create one by clicking on the “Sign up” button and following the prompts. Once you have successfully signed up and logged in, you will be ready to use Leonardo.ai for your storybook project.
Step 2: Selecting Image Dimensions and Quantity
Before generating the images, you need to decide on the dimensions and quantity that best fit your storybook’s requirements. Leonardo.ai offers various image sizes and aspect ratios to choose from. Consider the layout of your book and the size you want your images to be. You may also want to ensure consistency throughout the book by using the same dimensions for all the images.
Additionally, determine the number of images you need for each chapter. This will depend on the length of your story and the number of key scenes or moments you want to illustrate. Take your time to plan and make a list of the images you want to generate for each chapter.
Step 3: Generating Story Images
Once you have finalized the image dimensions and quantity, it’s time to generate the story images. Leonardo.ai allows you to generate images based on text prompts, which makes it ideal for creating visuals that correspond to your story’s context.
Paste the story prompt from your Chat GPT-generated chapter into Leonardo.ai’s text prompt field. Make sure to include any relevant details or descriptions that you want the AI to consider while generating the images. Click on the “Generate” button and let Leonardo.ai work its magic.
You may need to experiment with different prompts or make slight adjustments to get the desired results. Feel free to iterate and refine the prompts until you are satisfied with the generated images.
Step 4: Saving the Desired Images
Leonardo.ai allows you to preview the generated images and select the ones you like. Take your time to go through the generated images for each chapter and choose the ones that best represent the corresponding scenes or moments in your story.
Once you have selected the desired images, save them to your computer or a cloud storage platform for easy access later when you are creating your storybook in Canva. Make sure to organize the images by chapter to avoid any confusion or mix-ups during the book creation process.
Step 5: Generating Chapter Context Images
In addition to generating images for the entire story, you can also use Leonardo.ai to generate images specifically for each chapter’s context. This will help in creating a seamless visual experience for your readers as they progress through your storybook.
To generate chapter context images, copy the context of each chapter from Chat GPT and paste it into Leonardo.ai. Follow the same steps as before, including selecting the appropriate image dimensions and quantity. Leonardo.ai will generate images that correspond to the specific context of each chapter, enhancing the reading experience by providing visual cues.
Step 6: Saving Chapter Context Images
Similar to the previous step, carefully review the generated chapter context images and save the ones that align with the tone and content of each chapter. Organize these images along with the previously generated story images for ease of access and reference during the book creation process.
By following these six steps, you can effortlessly generate story images and context using Leonardo.ai. The AI-powered tool will significantly expedite the visual creation process and ensure that your storybook captivates young readers with its engaging illustrations.
Now that you have generated the images for your children’s storybook, the next chapter will guide you through creating visual storyboards using Canva, another powerful design tool. Stay tuned!
Chapter 3: Creating Visual Storyboards with Canva
Now that you have a captivating children’s story written by Chat GPT and accompanied by beautiful images generated by Leonardo.ai, it’s time to bring everything together and create visually stunning storyboards for your book. In this chapter, we will explore how to use Canva, a popular online design tool, to effortlessly create storyboards that will captivate young readers and bring your story to life.
Canva is a user-friendly design platform that offers a wide variety of customizable templates for various purposes, including storybooks. With its drag-and-drop interface and extensive library of graphics and fonts, you can easily create professional-looking visuals even if you have no prior design experience.
To get started, head over to Canva.com and sign up for a free account. Once you’re logged in, you’ll be greeted with a dashboard where you can choose from a wide range of design templates. Search for “storybook” in the search bar to find the perfect template for your children’s storybook.
Once you’ve selected a template, it’s time to upload and arrange the images you generated using Leonardo.ai. Canva allows you to easily upload your own images by clicking on the “Uploads” tab on the left sidebar. Simply drag and drop your desired images onto the canvas and arrange them in the order that matches the flow of your story.
Now, let’s add the text from Chat GPT to the corresponding pages of your storyboard. Copy the contextual text for each chapter from Chat GPT and paste it over the relevant images in Canva. You can easily add text by selecting the “Text” tool from the left sidebar and clicking on the canvas. Customize the font, size, and color to match the tone of your story.
Repeat this process for all the chapters in your storybook, creating new pages as needed. Canva allows you to duplicate pages, making it easy to maintain consistency in your design throughout the book.
After adding the text to your storyboard, it’s time to customize the cover page. This is the first impression readers will have of your book, so make sure it stands out. Canva offers a range of graphics and fonts that you can use to create an eye-catching cover. Experiment with different designs until you find one that perfectly captures the essence of your story.
Once you’re satisfied with the cover, move on to the title page and chapter titles. These pages provide important information about your book and help guide readers through the story. Use Canva’s design elements to create visually appealing title pages and chapter headers that reflect the theme or mood of each chapter.
Now that your storybook is complete, it’s time to download it in PDF format. Canva makes it easy to export your design by simply clicking on the “Share” button and selecting the PDF option. Make sure to review your storybook carefully before finalizing the download, checking for any errors or inconsistencies.
With your storybook created, it’s time to explore publishing and selling your masterpiece. In the next chapter, we will delve into the process of publishing your storybook on Amazon Kindle Direct Publishing and setting the stage for earning passive income from your unique creation. Stay tuned!
Chapter 4: Publishing and Selling Your Storybook on Amazon Kindle Direct Publishing
Once you have completed the process of creating your children’s storybook using free AI tools like Chat GPT, Leonardo.ai, and Canva, it’s time to take the next step and publish your book. Amazon Kindle Direct Publishing (KDP) is a platform that allows self-publishers to easily make their books available to a wide audience. In this chapter, we will guide you on how to publish and sell your storybook on Amazon KDP.
Before you begin the publishing process, it’s important to ensure that your storybook is ready for publication. Make sure the text is error-free, the images are placed correctly, and the overall layout is visually appealing. Additionally, you should have a cover design that captures the essence of your storybook and entices potential readers.
To begin the publishing process, you need to create an account on Amazon KDP. If you don’t already have an Amazon account, you can easily create one by visiting the Amazon KDP website and following the registration instructions.
Once you have your account set up, you can access the KDP dashboard where you will find various options for creating and managing your books. Click on the “Create a Kindle eBook” button to start publishing your storybook.
The first step in publishing your storybook on Amazon KDP is to enter the book details. This includes providing information such as the book title, author name, book description, and keywords. Make sure to write a compelling book description that gives potential readers a glimpse into your story and ignites their curiosity.
Next, you will upload your storybook file. Amazon KDP supports several file formats, including PDF and MOBI. If you created your storybook in Canva, you can easily export it as a PDF file. Ensure that the formatting and layout of your book are preserved after conversion.
After uploading your storybook file, you will have the option to preview how your book will look on different devices. Take the time to carefully review each page to ensure everything looks as intended. Use the navigation buttons to navigate through the pages and make any necessary corrections.
Once you are satisfied with the preview, it’s time to set the pricing and royalty options for your storybook. Amazon KDP provides flexible pricing options, allowing you to choose between different royalty rates and pricing strategies. Consider factors such as the length of your storybook, market demand, and competitive pricing when setting the price.
In addition to the standard eBook pricing, you can also choose to enroll your storybook in Kindle Unlimited (KU) and Kindle Owners’ Lending Library (KOLL). These programs allow Kindle users to borrow and read books for free, and as an author, you can earn additional royalties based on the number of pages read.
Finally, it’s time to publish your storybook. Before clicking the “Publish Your Kindle eBook” button, double-check all the information you have entered and ensure that there are no errors. Once published, your book will be available on the Amazon Kindle Store for purchase.
After publishing your storybook, it’s important to promote and market it to reach your target audience. Consider utilizing social media platforms, author websites, and book promotion websites to spread the word about your newly published storybook. Encourage readers to leave reviews and ratings on your book’s page, as positive reviews can significantly impact sales.
In conclusion, publishing and selling your storybook on Amazon KDP is a relatively straightforward process. With the right tools and storytelling skills, you can create captivating children’s storybooks and earn passive income. Take advantage of the free AI tools available and unleash your creativity to bring unique and engaging stories to life. Start your journey as a self-published author today and share your imagination with the world!